

Communication is key during implementation! To best support your team and vendors during implementation, we offer a set of templated communications based on your implementation inclusions. These templates are available for you to utilize and edit as required by your team to encapsulate your voice and communication needs.
How to Use the Templates
- Locate the necessary template(s) to send to your internal team(s) or vendors
- Copy and paste the email template into your preferred email system
- Populate any fields highlighted in yellow and add or adjust the emails with any necessary details (e.g. holiday greeting, meeting reminder)
- Using your preferred email system, send the email to the recipients listed in the “To” field
Note: If you are sending an email to a large number of recipients, we recommend sending the email to yourself and then Bcc’ing all recipients to hide their addresses
Internal – Team Communications
These communications are intended to be sent to your internal legal team(s) to communicate the upcoming Unity implementation and planned go-live date.
Unity Onboarding, New ELM System
Purpose: Notify your legal team members of upcoming Unity implementation of a new ELM system
When to Send: At the start of implementation, ideally at least 1 month prior to the go-live date
To: Client legal team members
From: Client implementation lead or project sponsor
Suggested Subject: [COMPANY] New Legal Operations Process
Email Body:
[COMPANY] is implementing a new legal operations software, Unity. This platform will assist [COMPANY] in streamline our legal billing/invoicing and matter management processes. [add any other reasoning, communications to internal team for
adding Unity].
Unity will give us more control of our processes and increased visibility into matters and spend. With this new platform:
- Matters created in Unity can be assigned to Vendors for billing.
- Vendors / law firms can submit invoices (digital LEDES and PDFs) through the Unity vendor portal, Counsel Exchange.
- [COMPANY]’s approval process and rules are applied to the invoice in Unity allowing [COMPANY] members to approve within the application.
- Approved invoices will get processed directly to accounts payable.
- Report on legal matter and spend data from the same application.
Unity is slated to go live in [month of designated go-live date]. Prior to go live we will be coordinating training for the new system as well as cutover dates/process for final invoice submission into the old system. If you’d like to begin training in advance, please sign up for Unity’s Customer Webinars to learn more. In addition to live training; recorded training sessions and a variety of help tools, including frequently asked questions documentation, and customer support will also be available.
Finally, vendors will be notified separately of the upcoming changes and expectations with the new invoicing process.
If you have any questions about the new process, please reach out to [client implementation lead or project sponsor].
Unity Onboarding, Migrating ELM Systems
Purpose: Notify your legal team members of upcoming Unity implementation of migrating from an existing ELM system to Unity
When to Send: At the start of implementation, ideally at least 1 month prior to the go-live date
To: Client legal team members
From: Client implementation lead or project sponsor
Suggested Subject: [COMPANY] New Legal Operations Process
Email Body:
[COMPANY] is implementing a new legal operations software, Unity. This platform will assist [COMPANY] in streamline our legal billing/invoicing and matter management processes. [add any other reasoning, communications to internal team for adding Unity].
We understand that change can be scary, but we are excited for this upgrade to our team! After deliberation, we have decided to make this move due to [insert purpose for the migration (e.g. streamlining services, vendor ease, additional spend insights, etc)]
Unity will give us more control of our processes and increased visibility into matters and spend. With this new platform:
- Matters created in Unity can be assigned to Vendors for billing.
- Vendors / law firms can submit invoices (digital LEDES and PDFs) through the Unity vendor portal, Counsel Exchange.
- [COMPANY]’s approval process and rules are applied to the invoice in Unity allowing [COMPANY] members to approve within the application.
- Approved invoices will get processed directly to accounts payable.
- Report on legal matter and spend data from the same application.
Unity is slated to go live in [month of designated go-live date]. Prior to go live we will be coordinating training for the new system as well as cutover dates/process for final invoice submission into the old system. If you’d like to begin training in advance, please sign up for Unity’s Customer Webinars to learn more. In addition to live training; recorded training sessions and a variety of help tools, including frequently asked questions documentation, and customer support will also be available.
Finally, vendors will be notified separately of the upcoming changes and expectations with the new invoicing process.
If you have any questions about the new process, please reach out to [client implementation lead or project sponsor].
Unity Training
Purpose: Instruct Legal Team members on signing up for Unity training
When to Send: At the start of implementation, ideally at least 1 month prior to the go-live date
To: Internal Legal team members who will be attending training
From: Internal Unity Implementation Lead
Suggested Subject: REQUIRED – Unity Training Sign-up
Email Body:
[COMPANY] is now using eBilling provider Unity to make it easier to manage and pay your legal bills. To ensure our team is ready for our Unity go-live of [GO-LIVE DATE], we are asking that everyone sign-up for and attend the following trainings:
Administrative Training: Admin Training will cover all things you need to know when working in Unity. We’ll show you how to use the Unity Dashboard, go over Administrative functions such as User Management and Invoice Review Rules, and walk you through Matter Management and Vendor Management.
- Required Attendees: [INSERT TEAM MEMBERS REQUIRED FOR TRAINING]
- Suggested Training Session: [INSERT SUGGESTED TRAINING TIME]
- Training Due Date: [INSERT DATE TRAINING TO BE COMPLETED BY]
- Where to Sign-up: Unity’s Customer Webinars
Invoice Review Training: Invoice Review Training we’ll take you through the life of a Unity invoice and show you important dashboards and reports you should utilize. In addition, we’ll walk you through approving, rejecting, and adjusting an invoice.
- Required Attendees: [INSERT TEAM MEMBERS REQUIRED FOR TRAINING]
- Suggested Training Session: [INSERT SUGGESTED TRAINING TIME]
- Training Due Date: [INSERT DATE TRAINING TO BE COMPLETED BY]
- Where to Sign-up: Unity’s Customer Webinars
How to Sign-up: Under “Register for Webinars” enter your name and select your preferred session. If you are not able to attend your session (or any sessions provided) please sign up to receive a recording of the session once completed.
External – Vendor Communications
These communications are intended to be sent to your primary vendor contacts to communicate the upcoming Counsel Exchange go-live date.
Initial Counsel Exchange Onboarding Notice
Purpose: Notify your vendors of upcoming Counsel Exchange roll out. When to Send: At the start of implementation, recommended 2–4 weeks prior to the “Counsel Exchange Onboarding” email template. To: Law Firm Billing Contacts or Relationship Contacts From: Company Relationship Contact Suggested Subject: [COMPANY] Updated Invoicing Process
Email Body:
[COMPANY] is implementing a new legal operations software, Unity. This platform will help [COMPANY] streamline our legal billing/invoicing and matter management processes. We are targeting to roll out the system in [MONTH, YEAR] and will provide further communication as we get closer.
To prepare for the onboarding, please begin collecting the following details:
- Law Firm/Vendor Name
- Law Firm/Vendor Billing Address (Street, City, State, Zip, Country)
- Law Firm/Vendor Billing Contact Name*
- Law Firm/Vendor Billing Contact Email*
*Please provide a billing or AP contact, not a legal contact.
The upcoming implementation will include a subscription fee but, for now, no action is required on your part, and we kindly ask that you hold any questions until we share more details in a future communication.
Counsel Exchange Onboarding
Purpose: Notify your vendors of upcoming Counsel Exchange roll out
When to Send: Recommended 4-6 weeks prior to the go-live date
To: Law Firm Billing Contacts or Relationship Contacts
From: Company Relationship Contact
Suggested Subject: [COMPANY] Updated Invoicing Process
Email Body:
[COMPANY] is now using eBilling provider Unity to make it easier to manage and pay your legal bills. Unity provides a vendor portal called Counsel Exchange to submit invoices, check invoice status, and see a list of matters assigned to your firm.
How to Obtain Counsel Exchange Access
- (exclude this step if your team is not using the Google form) Please fill out the following form [GOOGLE FORM LINK provided by your Implementation Manager] to collect your billing administrator. Please do not send generic email addresses such as “ebilling@” Generic addresses are not allowed for security reasons.
- [COMPANY] will add your firm as a vendor in Counsel Exchange on [GO-LIVE DATE], you will not have Counsel Exchange access until this date. If you are not the correct contact person to register for Counsel Exchange, please forward this information to the appropriate person(s).
- Once your account is set up:
- New to Counsel Exchange? Your billing admin will receive an email with a link to your account. They should log in and create a password as soon as possible. The link will expire in 5 days.
- Already using Counsel Exchange? [COMPANY] will appear on the Counsel Exchange dashboard(s) of your billing specialist(s) on [GO-LIVE DATE].
- Counsel Exchange has been designed to be intuitive and easy to use. There is a “wizard” that walks the billing specialist(s) through the invoice submission process.
- For more information on Counsel Exchange, please read Getting Started with Counsel Exchange.
Invoice Submission Process
- All invoices prior to [GO-LIVE DATE] should be submitted via the old process.
- All invoices starting on [GO-LIVE DATE] should be submitted via Counsel Exchange.
- Invoice file submission:
- LEDES Invoices: [COMPANY] would like your firm to submit invoices in LEDES format with the PDF version. You may submit multiple LEDES/PDF invoices at the same time. Simply drag and drop, or select the files from your computer, and click SUBMIT.
- Non LEDES Invoices: If you are unable to produce LEDES files, you will need to enter the invoice information manually via the invoice entry screens. Be sure to list flat fee line items separately from those where the timekeeper is billing hourly. Be sure to drag and drop or select the PDF invoice prior to submission.
Law Firm Subscription Fees
As part of the onboarding process, similar to all other e-billing systems, a subscription fee will be included with your setup. These fees are designed to ensure you receive the best tools and support for a seamless and successful partnership.
Once your onboarding is complete, Onit’s accounting team will send invoices for these fees. Expect an email from [insert current billing sender address, e.g. [email protected]]. We’re committed to making this process straightforward and transparent, and we’re here to ensure everything runs smoothly.
Thank you for your attention to this change in process. For technical questions, contact [email protected]. Please contact [COMPANY or COMPANY CONTACT] with any questions, or your Counsel Exchange Administrator to add additional Counsel Exchange users (more information on updating Counsel Exchange user roles can be found here).
Counsel Exchange Onboarding Reminder
Purpose: Remind your vendors of upcoming Counsel Exchange roll out
When to Send: Recommended 2 weeks prior to the go-live date
To: Law Firm Billing Contacts or Relationship Contacts
From: Company Relationship Contact
Suggested Subject: Reminder: [COMPANY] Updated Invoicing Process
Email Body:
As a reminder to the communication sent on [DATE OF INITIAL COMMUNICATION], [COMPANY] is now using eBilling provider Unity to make it easier to manage and pay your legal bills. Unity provides a vendor portal called Counsel Exchange to submit invoices, check invoice status, and see a list of matters assigned to your firm.
How to Obtain Counsel Exchange Access
- (exclude this step if your team is not using the Google form) Please fill out the following form [GOOGLE FORM LINK provided by your Implementation Manager] to collect your billing administrator. Please do not send generic email addresses such as “ebilling@” Generic addresses are not allowed for security reasons.
- [COMPANY] will add your firm as a vendor in Counsel Exchange on [GO-LIVE DATE], you will not have Counsel Exchange access until this date. If you are not the correct contact person to register for Counsel Exchange, please forward this information to the appropriate person(s).
- Once your account is set up:
- New to Counsel Exchange? Your billing admin will receive an email with a link to your account. They should log in and create a password as soon as possible. The link will expire in 5 days.
- Already using Counsel Exchange? [COMPANY] will appear on the Counsel Exchange dashboard(s) of your billing specialist(s) on [GO-LIVE DATE].
- Counsel Exchange has been designed to be intuitive and easy to use. There is a “wizard” that walks the billing specialist(s) through the invoice submission process.
- For more information on Counsel Exchange, please read Getting Started with Counsel Exchange.
Invoice Submission Process
- All invoices prior to [GO-LIVE DATE] should be submitted via the old process.
- All invoices starting on [GO-LIVE DATE] should be submitted via Counsel Exchange.
- Invoice file submission:
- LEDES Invoices: [COMPANY] would like your firm to submit invoices in LEDES format with the PDF version. You may submit multiple LEDES/PDF invoices at the same time. Simply drag and drop, or select the files from your computer, and click SUBMIT.
- Non LEDES Invoices: If you are unable to produce LEDES files, you will need to enter the invoice information manually via the invoice entry screens. Be sure to list flat fee line items separately from those where the timekeeper is billing hourly. Be sure to drag and drop or select the PDF invoice prior to submission.
Thank you for your attention to this change in process. For technical questions, contact [email protected]. Please contact [COMPANY or COMPANY CONTACT] with any questions or your Counsel Exchange Administrator to add additional Counsel Exchange users within Counsel Exchange (more information on updating Counsel Exchange user roles can be found here).
Law Firm Subscription Overview
Purpose: Notify your vendors of Counsel Exchange’s legal vendor subscription. When to Send: Recommended ~4 weeks prior to the go-live date. To: Law Firm Billing Contacts or Relationship Contacts From: Company Relationship Contact Suggested Subject: [COMPANY] Important Update: Annual e-Billing Platform Fee
Email Body:
To streamline and improve our billing and payment processes, we will be transitioning to Counsel Exchange by Onit for e-billing. This platform ensures invoices are submitted, tracked, and processed in alignment with our billing guidelines, helping reduce delays and improving the overall payment experience.
As with all major e-billing platforms, Counsel Exchange includes a standard annual platform fee for firms. Invoices for this fee will come from [insert current billing sender address].
To avoid any confusion, here are the essentials:
Why This Fee Exists The fee supports your continued access to the Counsel Exchange platform. This structure is common across legal e-billing systems and helps maintain a reliable, efficient environment for invoice submission and management.
How the Fee is Calculated The platform fee is based on your firm’s annual invoice volume. You are placed in a tier that aligns with your actual billing, ensuring the fee reflects your usage.
[Insert your law firm subscription tiers, or provide the vendor’s subscription tier and associated fee.]
When This Takes Effect Beginning [GO-LIVE DATE], firms will receive an invoice from Onit for the applicable tier. Tiering is reviewed periodically, and firms will be notified if billing volume increases to a higher tier during the subscription year. Future renewals will follow the same structure.
We are sharing this information in advance to ensure a smooth transition. Our goal is to minimize administrative friction and support timely, predictable payment processing for all our partners.
If anything needs clarification, feel free to reach out, but no action is required at this time.
Thank you for your ongoing partnership.
Accruals Onboarding
Purpose: Notify your vendors of upcoming accrual roll out
When to Send: Recommended 2-4 weeks prior to the first accrual email request
To: Law Firm Billing Contacts or Accrual Contacts
From: Company Relationship Contact
Suggested Subject: [COMPANY] Updated Accrual Collection
Email Body:
[COMPANY] is now using eBilling provider Unity to make it easier to manage and pay your legal bills. Unity provides a vendor portal called Counsel Exchange to submit invoices, check invoice status, and see a list of matters assigned to your firm. Additionally, [COMPANY] will use Unity to collect and track accruals.
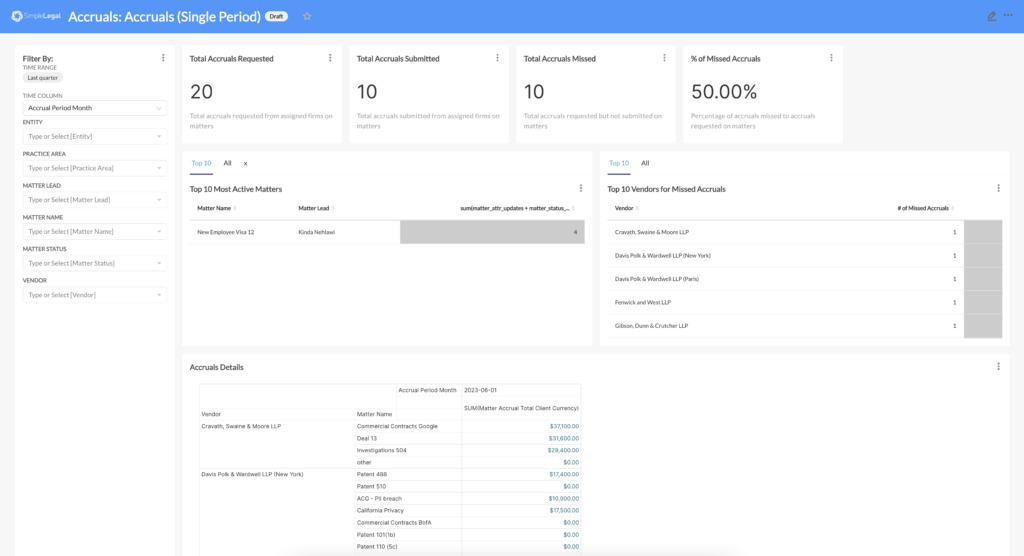
What are accruals? Also known as Work in Process or Unbilled Estimates, include costs and expenses, such as legal fees, for services that have been provided but not yet invoiced as of a cut-off date. Securities and financial requirements mandate that companies keep and report accurate accounting records. Accruals are critical to these reporting obligations.
How to submit accruals? Each period, Unity will send you up to 3 email reminders:
- Click the email link to “Submit Unbilled Amount” or “We Have No Unbilled Activity” if there are no unbilled estimates to submit
- Enter the unbilled amounts for the applicable period
- Confirm the last invoice submitted is correct and there are no missing billed invoices
- Click “Submit Unbilled Amount”
- The first email reminder to submit accruals for [MONTH, YEAR] will go out on [DATE]. You will have until [EXPIRATION DATE] to submit your accruals before the link expires.
Please contact [COMPANY or COMPANY CONTACT] with any questions or your Counsel Exchange Administrator to update your Accruals contacts within Counsel Exchange (more information on updating Counsel Exchange user roles can be found here).
Timekeeper Onboarding
Purpose: Notify your vendors of upcoming Timekeeper roll out
When to Send: Recommended 2-4 weeks prior to the go-live date
To: Law Firm Billing Contacts or Relationship Contacts
From: Company Relationship Contact
Suggested Subject: [COMPANY] Updated Timekeeper Approval Process
Email Body:
[COMPANY] is now using eBilling provider Unity to make it easier to manage and pay your legal bills. Unity provides a vendor portal called Counsel Exchange to submit invoices, check invoice status, and see a list of matters assigned to your firm. Additionally, [COMPANY] will be using Unity to validate approved timekeeper rates on incoming invoices, to support our business relationships and streamline invoice reviews.
Effective [DATE], [COMPANY] will begin tracking approved timekeeper rates through Counsel Exchange. Please submit your firm’s timekeepers and their current rates, instructions for submitting rates can be found here.
Thank you for your attention to this change in process. For technical questions, contact [email protected].